> For the complete documentation index, see [llms.txt](https://docs.thunkable.com/llms.txt). Markdown versions of documentation pages are available by appending `.md` to page URLs; this page is available as [Markdown](https://docs.thunkable.com/ai/app-design/assets.md).
# Assets
### Overview
Assets refer to multimedia files or resources integral to an app's design and functionality, such as images, audio files, videos, PDF documents, Animations, and fonts.
## Managing Assets
### Assets Panel
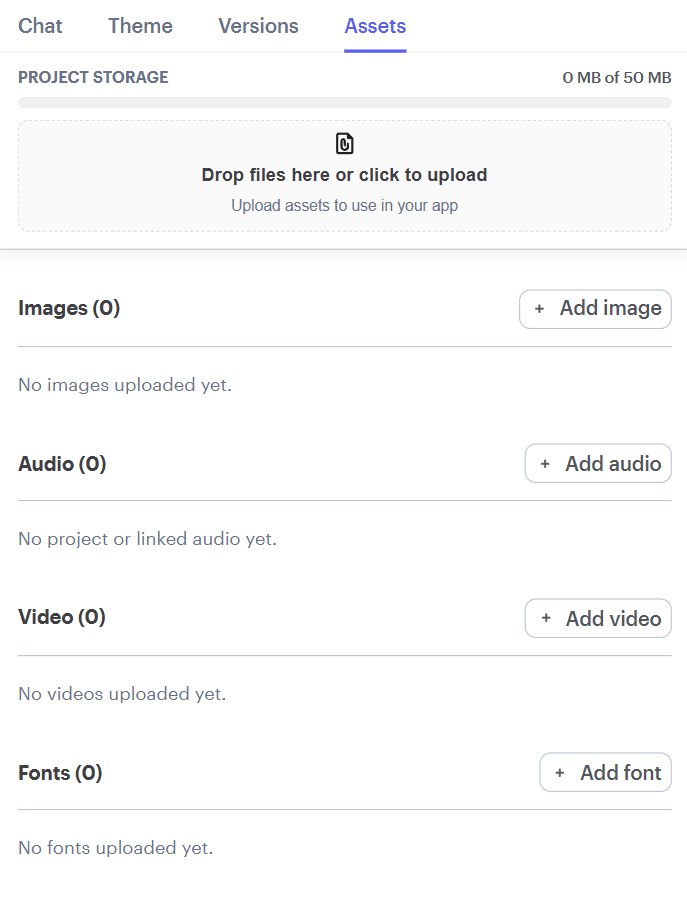
Use the Assets panel to upload, rename, and manage all assets in your project.
To access your project's Assets panel:
1. Click **Assets** in the left navigation menu.
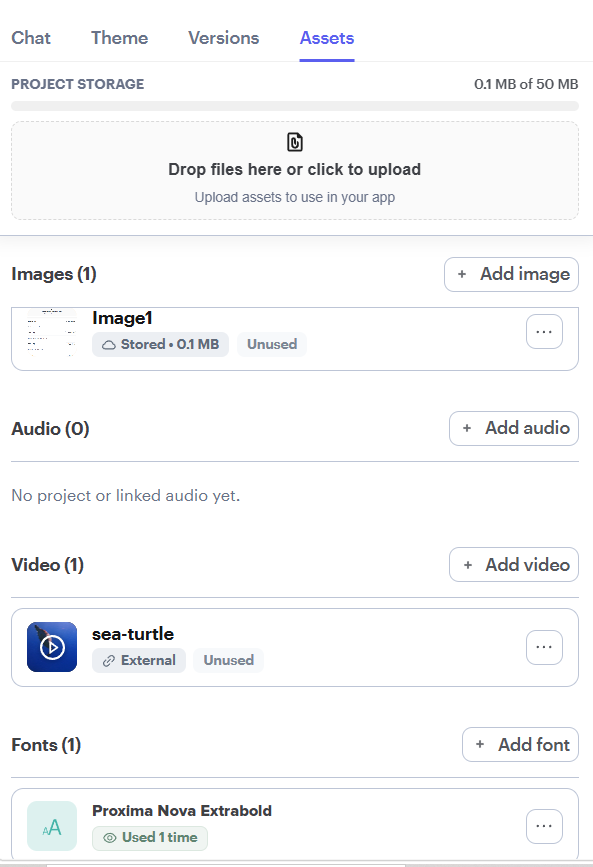
In the Assets panel, you can view:
* The total asset size for your project
* The size of each asset
* Whether an asset is stored in your project or hosted externally
* Whether an asset is currently being used
### Import Assets
**Upload a File**
To upload a file to your Thunkable project assets:
1. Click Assets in the Chat Toolbar.
2. Click **Drop files here or click to upload** to select a file from your computer, or drag the files into the provided drop window.
**Import an Image, Audio File, Video, PDF, or Animation from a URL**
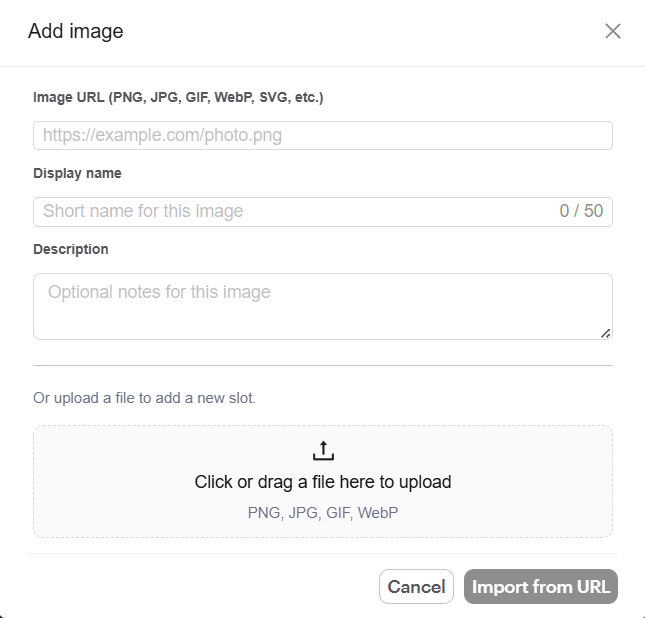
To import an **Image, Audio, Video, PDF, or Animation from a URL** into your Thunkable project:
1. Click Assets in the Chat Toolbar.
2. Click **+ Add image, + Add audio, + Add video, + Add PDF, or + Add animation**.
3. Paste the URL and optionally set the Display name and the Description. The URLs must end in a file extension.
4. Click **Import from URL**.
{% hint style="info" %}
In this dialog, you can also upload a file instead of importing it from a URL.
{% endhint %}
{% hint style="info" %}
You can find an animation and add it to your project by browsing the animation library.
{% endhint %}
### Edit Assets
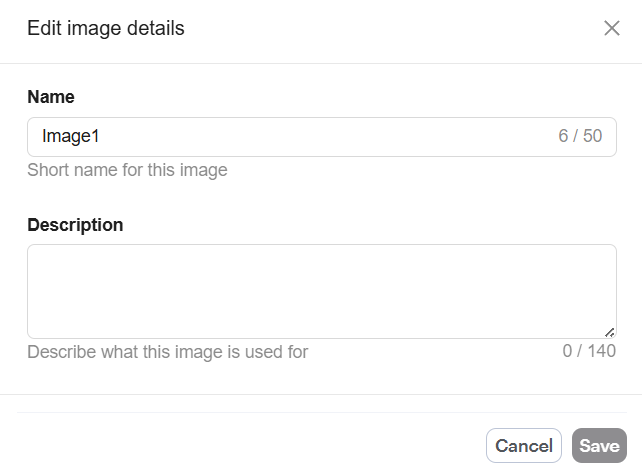
To edit an **Image, Audio, Video, PDF, or Animation**:
1. Click **Assets** in the Chat Toolbar.
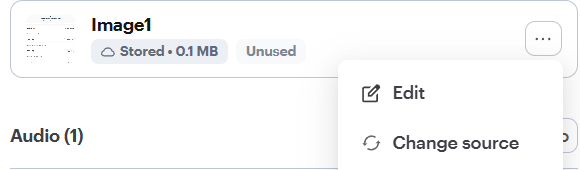
2. Click the **ellipsis** (**...**) next to the asset.
3. Click Edit.
4. Update the Display name and/or Description.
5. Click **Save**.
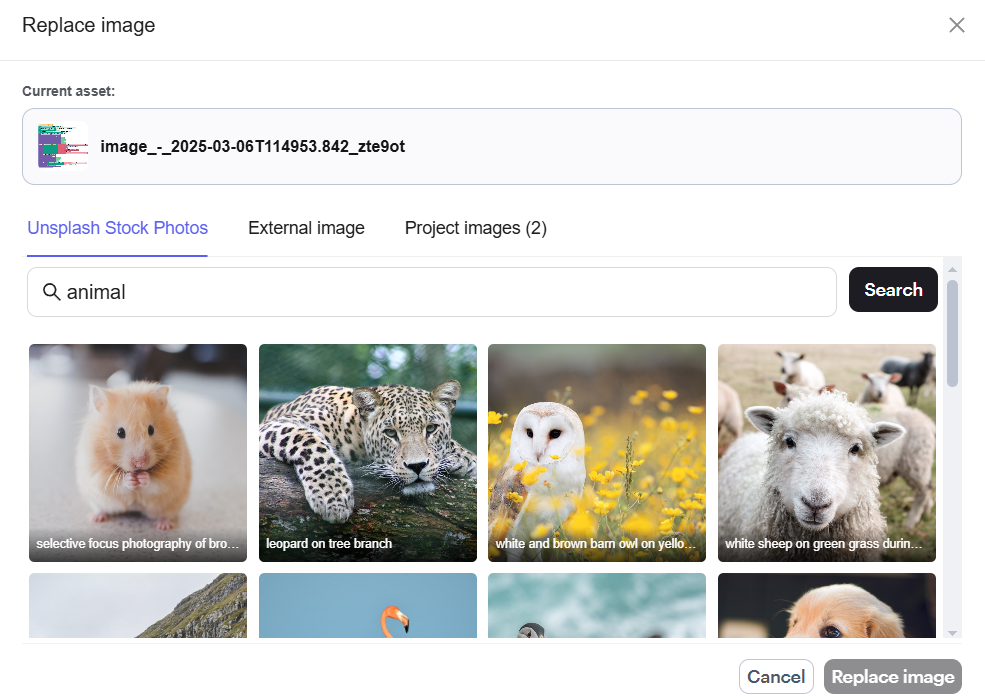
### Change Source file
To change an **Image, Audio, Video, PDF, or Animation**:
1. Click **Assets** in the Chat Toolbar.
2. Click the **ellipsis** (**...**) next to the asset.
3. Click **Change source**.
4. Either:
* Paste a URL, and then click **Save Changes**, or
* Upload a new file.
For images, you can also select an **Unsplash Stock Photo** and then click **Replace Image**.
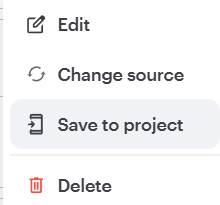
### Save a File to Your Project
To save an asset that was imported from a URL into your project:
1. Click **Assets** in the Chat Toolbar.
2. Click the **ellipsis** (**...**) next to the asset.
3. Click **Save to project**.
### Delete Assets
To delete an asset from your Thunkable project:
1. Click **Assets** in the Chat Toolbar.
2. Click the **ellipsis** (**...**) next to the asset.
3. Click **Delete**.
## Account Storage Limits
Each plan has a limited account storage capacity.
| Free | Accelerator | Builder | Advanced |
| ----- | ----------- | ------- | --------- |
| 100MB | 250MB | 1GB | Unlimited |
You can view your total account storage size in your account settings.
## App Limits
Each plan has a limited project storage capacity.
| Free | Accelerator | Builder | Advanced |
| ---- | ----------- | ------- | -------- |
| 50MB | 100MB | 100MB | 200MB |
## Mention Assets in Chat
You can reference existing project assets directly in the chat when prompting the AI.
To mention an asset:
1. In the chat input, type **@**.
2. Select **Images**, **Audio, Video**, or **PDF** from the dropdown.
3. Choose the asset you want to reference.
Once selected, the asset is inserted into your message as a tag rather than plain text, making it easy to identify and ensuring the AI references the correct asset.
{% hint style="info" %}
Only assets that already exist in your project are available from the **@** menu.
{% endhint %}
## How to Store and Access Files in Cloudinary
To store and access Cloudinary Files:
1. Create a free Cloudinary account here: [cloudinary.com](https://cloudinary.com/).
2. Click on the **Upload** button to open the [upload Widget](https://cloudinary.com/documentation/upload_widget).
3. Upload your files. There is also an option to upload assets from Google Drive into Cloudinary.
4. Click on the uploaded file.
5. Click **Share.**
6. Click **Embed.**
7. Copy the URL.
## Lists Panel
Use the Lists panel to view, create, edit, and manage lists in your Thunkable project. Lists store structured data in rows and columns that can be used throughout your app.
To access your project's Lists panel:
1. Click Lists in the left navigation menu.
In the Lists panel, you can view:
* The total number of lists in your project.
* The name of each list.
* The number of rows in each list.
#### View a List
To view the contents of a list:
1. Click the list you want to open.
2. View the data organized into rows and columns.
The list editor displays the total number of rows, the number of columns, and the data format.
Note: List data is built into your app, so anyone who installs the app can read it. Avoid storing sensitive information in lists.
#### Create a List
To create a new list:
1. Click + Add list in the Lists panel.
2. Follow the prompts to create your list and add its data.
#### Edit a List
To edit an existing list:
1. Click the ellipsis (...) next to the list.
2. Click Edit.
3. Make the necessary changes.
You can also click a list to open it and manage its rows directly.
#### Add Rows
To add a new row:
1. Open the list.
2. Click + Add row.
3. Enter the values for the new row.
To add multiple rows from an existing file:
1. Click the ellipsis (...) next to the list.
2. Select Add rows from file.
3. Select the file containing the additional data.
#### Download a List as CSV
To export a list:
1. Click the ellipsis (...) next to the list.
2. Select Download CSV.
You can also open the list and click Download CSV in the upper-right corner.
#### Replace a List's File
To replace the data in a list:
1. Click the ellipsis (...) next to the list.
2. Select Replace file.
3. Upload the replacement file.
#### Rename a List
To rename an existing list:
1. Click the ellipsis (...) next to the list.
2. Select Rename.
3. Enter the new name.
#### Delete a List
To delete a list from your project:
1. Click the ellipsis (...) next to the list.
2. Select Delete.
To delete an individual row, open the list and click the trash icon next to the row you want to remove.